


How To Clean Your Make-Up Brushes In 5 Simple Steps
5 minutes read
There is no nicer feeling than applying make-up with soft, freshly washed brushes. And yet, cleaning brushes is the task most make-up wearers loathe the most. We don’t blame you – the job is tedious, mundane and can sometimes take forever (depending on the size of your brush collection).
Thankfully, there are a plethora of products in the market that make the task a lot easier. And knowing the proper techniques will ensure you’re getting every bit of product, oil and dirt out for squeaky clean brushes. Here’s everything you need to know.
What happens when you use dirty brushes?
Procrastinating your brush washing may not seem like the biggest deal, but your skin will bear the brunt.
Used brushes collect oil, dirt and product residue and harbour all kinds of bacteria. If they’re not routinely washed, you risk the chance of contaminating any product the brush comes in contact with and, of course, your skin.
This could cause rashes, spots and acne breakouts. If you have an eye infection or a cold sore, it’s particularly vital to wash your brushes after every use.
Plus, as layers and layers of product build up on the bristles of your brush, they could turn stiff. This will make them less effective in applying and blending your make-up. And no one wants that.
What to clean make-up brushes with
A cleansing agent
The main thing you need is a soap of some kind. You have many options here. You could choose a gentle soap or shampoo – baby shampoos work well for this.
We like the multi-use Dr. Bronner’s Pure-Castile Lavender Liquid Soap. It cleans thoroughly while also leaving your brushes smelling like soothing lavender. To remove particularly stubborn make-up, you could also use a bit of washing-up liquid diluted with water.
If you’re happy to invest in one, there are also tons of brush cleansers – for example, the Solid Blendercleanser by Beautyblender works for both brushes and sponges and also comes with a silicone scrubbing pad.
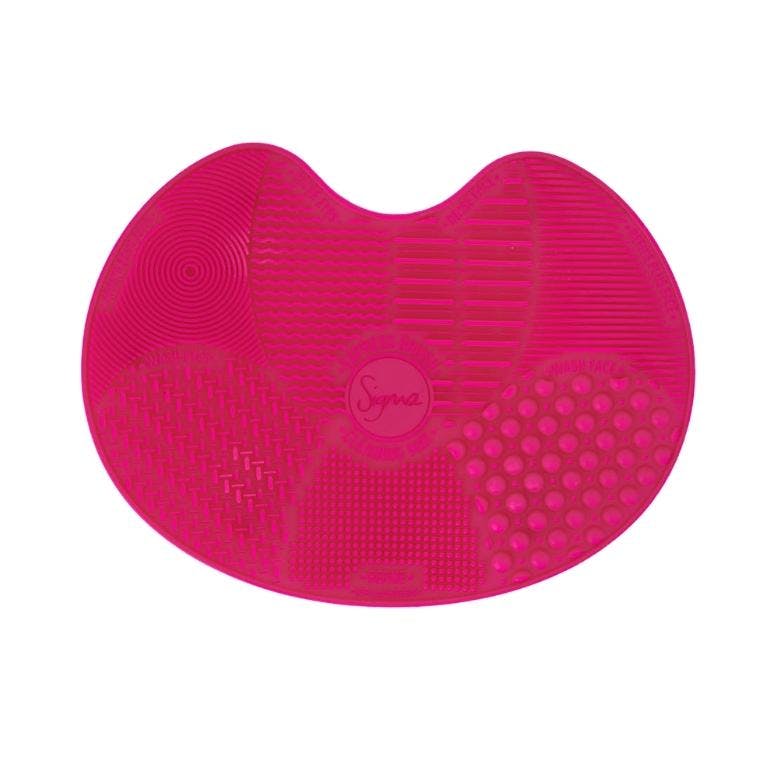
A cleaning device
Using just your hands to clean your brushes works fine but can leave your skin feeling a bit dry and pruney. To avoid it, use the Sigma Beauty Spa Express Brush Cleaning Mat. Its surface features seven different textures that help scrub and deep clean the bristles.
A high-tech tool
If you’re serious about your brush cleaning (or are just looking for a quicker way to do it), there are some great tools you can invest in. The STYLPRO Makeup Brush Cleaner is a battery-operated device that lets you wash and dry your brushes within minutes.
How often should you wash your brushes?
This depends on various factors: whether you use the brushes on yourself or other people, how often you wear make-up and the type of products you use.
But generally, if you’re using the brushes on your face and wear make-up reasonably often, a deep clean once every week or two should suffice.
You can conduct quick cleanses for specific brushes more often with a cleanser like the NYX Professional Make-up On The Spot Make-Up Brush Cleaner Spray. All you need is a spritz of it on a paper towel that you can swirl your brush around in to get rid of pigment. No rinsing is necessary. Although this can’t replace routine deep cleanses, it helps quickly clean a soiled brush on the go, and you can also share your brushes and products with friends.
A step-by-step guide to deep cleaning make-up brushes
Step one
Choose the brush you want to clean. If you want to clean more than one at a time, make sure they’re of a similar size and shape, although it’s best to avoid washing more than two at a time.
Dampen the bristles in a cup of warm water or under a running tap.
Step two
Cover the bristles in soap. Use the cleansing agent of your choice – a gentle shampoo, a soap or a specifically designed brush cleanser. Work the product into the bristles by swirling the brush back and forth on the back of your hand or a cleansing mat.
Once the soap has lathered up, use your fingers to squeeze out the product build-up from the bristles.
Step three
Rinse the brush under running water. Use the back of your hand or the cleansing mat again to help get the soap out.
Be careful to wet only the bristles and not the entire body of the brush. You don’t want to loosen the glue that holds your brush together.
Step four
For dirty brushes, repeat the process until all the pigment is out and the soapy water runs clear. You will find foundation and concealer brushes need more thorough cleaning than an eyeshadow brush you use with lighter colours.
Pro tip: “A trick I learned in make-up school is to use hair conditioner on my brushes post-washing to keep the bristles soft,” says Beauty Writer Nishita Fiji. “I do this once every couple of months, and it keeps the bristles from getting rough.”
Step five
When your brushes are clean, press the bristles to squeeze the water out. Then, place them horizontally on a towel.
Leave them to air dry on your kitchen counter or any other flat, even surface, with the body of the brush resting on the towel and the bristle-end hovering over the edge. This will ensure the brush gets an all-around airing, helping it dry quickly.
Once your brushes are washed and clean, notice how they perform better than ever – the right tools for the job and all that…
Skin & Beauty

9 Skincare Myths To Avoid, According To Experts

How to Improve Skin Texture


Editor's Choice
Must-Try White Nail Designs For The Summer


The New Neutral Nails: A Manicure For All Seasons


Sign up for our newsletter
We will keep you in the loop for special offers, exclusive gifts and product news.